

How To Repair A Chip In A Fiberglass Edge
![]()
Want to put your Fiberglass Repair knowledge to the test?
Fiberglass & Composites Overview
Composites offering numerous advantages over conventional edifice materials. One reward that might not be obvious is the ease and durability of repairs. Considering many lack the knowledge to repair composite parts and molds, damaged items are oft replaced; for those that have a beginner's understanding, the procedure may seem intimidating at first. Fear non, composite parts are ofttimes easier to repair than parts made from traditional materials. In this article we will provide a basic understanding of composite repairs, also as detailed steps and considerations to follow for both structural and cosmetic repairs.
If you lot have landed on this article and accept no previous knowledge of composite materials or the typical composites manufacturing processes, you might want to read some additional articles in our learning center. Nosotros have other articles that can help with some bones noesis, including getting started in composites, the fundamentals of fiberglass, virtually resins, about reinforcements, and molding fiberglass. A broader understanding of composite materials and manufacturing methods, along with a little do, can go a long way towards a more successful repair.
One point to get beyond prior to the heart of the article, nosotros will use the terms composite repair and fiberglass repair interchangeably. This is because the techniques described will work for any fiberglass structure also as many "advanced" composites made from Carbon Cobweb and KEVLAR®. The overall concepts can exist practical to almost composite materials. That means we will provide y'all with the fundamentals for a wide variety of repairs—from cosmetic gel coat repairs, to intermediate boat and auto trunk repairs—all the fashion through structural composite repairs. 1 caveat, however, is that for sure parts, specialized procedures—beyond those described by this commodity—may be necessary. Manufacturers of highly technical or structural parts often publish detailed repair data specific to their parts. Our position is that the manufacturer's instructions supersede all other information we provide and should be followed completely. More often than not, manufacturer'southward instructions are more specific and will not contradict the standard repair procedures outlined here. Caveat aside, when the fiberglass repair instructions in this commodity are well executed, strong repairs will consequence whether yous are doing professional person composites repair or diy fiberglass repairs.

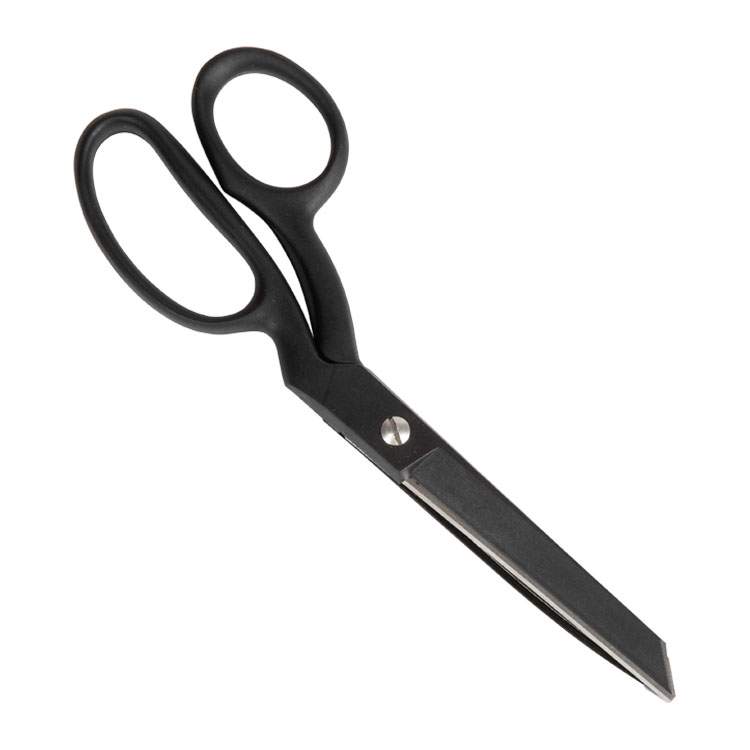
Featherweight Scissors
Lightweight, Durable, and Extremely Abrupt. Gingher® Featherweights are versatile enough to tackle nearly jobs in the workshop.
Store Now

Quart Mixing Set
Simplify your project and let u.s. get together supplies for you. This set up contains what you need to mix i quart of resin and corresponding hardener.
Shop Now

Plastic Rollers
These Plastic Rollers are straight across the width of the head and provide excellent air relief for well-nigh all applications.
Shop Now


The Complete Fiberglass and Blended Library [DVD]
The Complete How-To for Composites
Shop Now
What should I know about fiberglass repair?
There are a few fundamental principles that, once understood, let most blended repairs to be completed successfully. Successful repairs let yous to extend the life of a office or mold and save you the price of replacing your composite part. Beginning by because these three main principles of composite repair:
-
Repairs differ from the original part — The offset principle you must understand is that structural repairs are fabricated by a different process than the original piece. When a composite part is initially manufactured, its resin cures bonding both chemically and physically with the reinforcement fabric resulting in a unmarried unit, regardless of the number or orientation of the plies of fabric. This is referred to as the chief structure or bail, and it is the strongest type of bail that tin exist within a composite part.
Once a part is damaged, all repairs become secondary bonds fastened to the original chief construction. This means all repairs are dependent upon physical bonding to the surface of the original master structure (more than on this afterward). For this reason, fiberglass repairs rely upon the adhesive quality of their resin for their strength—the strength of physical bond to the primary structure. Because of this, the resin used for the repair should exist simply as strong equally the resin used to fabricate the role. In fact, resins with strong agglutinative properties are sometimes used for repairs.
-
Increased surface area will increase the strength of composite repairs — Since fiberglass repairs depend upon surface adhesion (physical bonding) of the repair to the primary structure, increasing the surface area of the bond line will increase the strength and durability of the bail—and by extension the office or repair.
Typically, the method employed to increment the surface area is taper or scarf sanding. This type of sanding means the area next to the damage is sanded away gradually, more often than not resulting in approximately ½—¾ of an inch of area per ply of composite laminate. Scarf sanding is unremarkably done with a high—speed compressed—air ability sander. Since almost composite structures are adequately thin, this is a gentle procedure. The size of the taper, relative to the thickness of the laminate, is expressed as a ratio. Generally, the stronger or more disquisitional the repair needs to be, the larger the ratio. Structural repairs usually require a gentler taper, with a ratio of 20:i upwardly to 100:1.
An culling method employed to increment surface expanse is pace sanding. This procedure defines the size of the inner repair, so removes surrounding materials at a width of ½" per ply of the part, working towards the part surface. This results in a considerable growth of the repair surface and allows the fiber orientation to be axiomatic in each stride.
Both methods are acceptable for the bulk of blended repairs, though most consider scarfing to be easier, and it's more often than not considered better. Stepping results in sharp edges and butt joints in each repaired ply. It is besides hard to step sand without cutting through, potentially damaging the underlying plies.
-
You should match your repair to the original role when possible — While your composite repair is different than your original part, information technology is recommended that you duplicate the thickness, density, and ply orientation of the original laminate when making your repair. This will assist to maintain the functionality of the function. More than is not e'er better—in this case, if your repair is thicker than the original part, it will almost certainly be stiffer, regardless of the textile in use. Introducing various strengths within a part tin can crusade unintended stress points, eventually leading to material fatigue or failure. Information technology is better to carefully replace every ply that has been removed in the damaged surface area with an identical textile, placed in the same orientation when possible. This ply—for—ply replacement arroyo guarantees the repaired structure can withstand the aforementioned loads as the original, and that information technology volition disperse loads equally intended.
With these three fundamental principles in place: Repairs Differ from the Original Part, Increased Surface Area Increases Strength, and Repairs Should Lucifer your Original Role; you accept the foundation for understanding the sequences for repairs. As stated earlier, we are going to provide detailed steps for both structural fiberglass repairs and general corrective blended repairs. Proceed in mind that these are general steps, and certain applications may call for boosted steps or slight variances in approach.
Steps for Structural Composite Repairs
Since a structural composite repair will typically be followed by a cosmetic repair, we will outset with the instructions for the more severe damage. In this section we volition answer the ofttimes asked questions of "How exercise I repair fiberglass?" and "What do I demand to repair fiberglass". This will exist broken down into 4 steps:
- Audit and measure, identify and determine
- Removing the damaged cloth and set the surface
- Laminate the repair patch
- Audit the repair
Inspect and Measure, Identify, and Determine:
How to inspect damaged composites
There are iv chief categories for blended impairment, your repair may involve one or all of these categories depending upon the severity of the impact or failure. The categories are every bit follows:
- Tear — This damage results when the tensile strength of the composite part has been exceeded and the laminate has failed. This typically results in a fracture which extends completely through the substrate.
- Hole or Puncture — This damage is typically a result of an touch or cut. Holes and punctures are sometimes limited to surfacing layers or skins.
- Crushed Core — This damage applies only to composite parts containing sandwich core materials. Information technology is typically the result of an touch which forces the composite skin of the laminate to deflect—but not fail—causing the sandwich core material to collapse.
- Delamination — This damage results in layers of the material separating from each other. It is typically acquired by impact or stress between or across the layers.
How to measure the telescopic of your blended repair
Once y'all understand what type of damage you have, nosotros recommend that you use a contrasting marker to outline the boundary of the impairment. This will help you to understand the telescopic and magnitude of the harm, equally well as offer you the adventure to fully audit your part. Take note, however, that you should audit the damage carefully as the problem area often extends farther than tin can exist easily detected visually. One inspection tip we can offer is the money tap test. Past borer a coin around the surrounding surface area, y'all tin can apace and easily generate an audible difference between a solid laminate, a crushed cloth, and a potentially delaminated area.
Is this repair worth the effort?
Once the extent of the damage and the blazon of material is known, y'all should determine whether the part in question should be repaired or whether you're better off replacing information technology. If you've discovered the manufacturer's specifications while you were identifying the necessary materials, cheque whether the damaged expanse is too large to be repaired. If no information can exist reviewed, we recommend that you make a quick estimate of the materials and labor fourth dimension needed for the repair. Compare this figure to the price of a new part. Typically, if you tin can accomplish savings of at least l percent, you've met the cut—off to warrant proceeding with the repair.
Removing the damaged cloth and preparing the surface
Removing Damaged Fabric
Assuming you've already inspected the damaged area and marked it with a contrasting marker, y'all're ready to begin removing damaged material. When a function is cleaved or crushed, it can be difficult to realign the pieces because frayed fibers tend to "hang up" on 1 some other. In club to maximize the forcefulness of your repair, y'all will desire to place the sequence and orientation of the material as it is removed layer by layer. To help with this, use a saw blade to cut along the length of cracks or tears. This will save the stress on solid laminates, ofttimes assuasive them to render to their original shape with little or no force. Parts constructed with a sandwich cadre textile tend to pancake and mushroom, farther complicating realignment. A router is excellent for removing damaged core material without disturbing intact face skins.
When removing damaged material, effort to remove as piffling cloth as possible, then the scope of the repair does not abound larger than necessary. Be sure, however, to remove enough textile to leave yourself with a solid laminate, which is necessary for a good repair. Every bit yous are removing damaged material, periodically stop and conduct another coin tap exam. This will permit you to ensure you have removed all damaged material, and yous should continue grinding or cutting away until all damaged cloth is removed.
Back up the part and prepare the surface
After y'all've removed the damaged fabric, support the role and so nothing is distorted during the repair process. Sometimes this is as simple equally affixing a few strips of 2—inch broad masking tape, other times it is as elaborate equally a custom-made clamping construction. Generally speaking, high—operation parts have tighter tolerances and will crave a more precise support system. Once y'all've got the part supported, proceed with preparing the bonding surface. Every bit mentioned in a higher place, this typically involves grinding or sanding a taper or steps in the material effectually the damage. This is the critical step for functional repairs, but it is also oft overlooked or abused. Take your fourth dimension and ensure your repair is performed correctly.
If a taper is to be used, measure out the depth of the valley and calculate how far sanding must extend to achieve the desired ratio. Use your contrasting marker to mark the outer edge of your taper and begin sanding inward toward the valley. Be sure to remove cloth slowly so that the taper progresses evenly. As you expose each layer, write downwards the fabric type and orientation so that you can replace it in the same style.
When stride sanding, the initial calculation is even more precise. For example, assuming the damage is circular, two inches in diameter and there are five plies in the laminate, mark concentric circles expanding i—half inch per ply from the border of the innermost circumvolve. The final diameter of the prepared surface area will be seven inches. Begin sanding in the center until the deepest layer is exposed. Step out one—half inch and sand down to the second deepest layer and then on, until all five steps are prepared. A right-angle grinder offers the all-time experience and control for this fragile procedure.
With either method, for personal safety and cleanliness, we recommend that you tape the hose of a shop vacuum to the work surface so that grit can be removed while grinding is taking place. Additionally, be sure that y'all wear a respirator and if possible protective wearable as this is a very messy process and y'all desire to be as protected equally possible. When sanding is complete, the whole surface must be cleaned thoroughly. Vacuum whatever remaining dust and then wipe the surface thoroughly with a solvent rag. Acetone is usually sufficient for removing oil, grease, dust, wax or other surface contaminants which could potentially interfere with your repair's adhesion.
Helpful Products
| Item | Description | |
|---|---|---|
| Perma-Grit Jigsaw Blade | When removing the damaged portion of your role, the Perma-Dust Jigsaw blades assist prevent further damage | |
| Carbide Bit Burr Router Attachment | A router volition help permit you to remove damaged cadre material without disturbing the intact face pare | |
| Acetone | Applying Acetone to the surface of your function will remove contaminates that tin can touch the repair adhesion | |
| Contrasting Marker | Using a contrasting mark allows for quick recognition areas they are working on, in order to avoid unneeded piece of work | |
| Respirator | When cutting and sanding, information technology is important that y'all protect yourself from air born particulates | |
Laminate the fiberglass repair patch
Ready your blended patch materials
The first step to laminating the repair patch is pre-cut your patch materials to fit the repair. This includes pre-cutting the core material and all reinforcement plies to fit within the taper yous've prepared as you've readied the surface. If your office features a sandwich core material, cutting the core offset to fill the deepest hole. Note that some core materials, such equally Nomex® Honeycomb, have their own orientation which needs to exist aligned in the role. Be sure to cheque this for both sandwich core and reinforcement fabrics, consulting the listing that was fabricated during the training process so that each reinforcement ply is cutting to fit in the proper orientation. Cut each ply and then that it fits precisely into the expanse of the taper or into the step that was prepared for it. Modern repairs are made ply—by—ply, so the smallest slice is intended to get outset, into the bottom of the valley. Stack the reinforcements near where they will be used, with the first layer to be placed in the bonding surface area on top of the pile.
Measure, mix, and apply your resin
Once your patch materials are prepared, pre—weigh the reinforcement schedule. You should target a 50:50 cobweb to resin ratio for your repair, then once you take weighed your reinforcements, measure out the same weight of resin. Add catalyst or hardener and mix the resin as instructed.
Once you've measured and mixed your resin, start by pre—wetting the entire bonding area with resin. This will allow you to build a movie of resin beyond the entire bonding area, maximizing the concrete bond. Next you can begin saturating each ply of reinforcement before it is placed onto the part. Work on a sheet of plastic so the fabric can be easily lifted from the tabular array once it'due south ready. A flexible condom squeegee is the best tool for spreading resin evenly through fabric and removing any excess resin which may be nowadays. Place each layer of reinforcement into its spot on the repair, ensuring proper orientation. 
Photo credit IStock Photo.
Terminate every few layers to compact and debulk the patch as much as possible. The number of layers you can apply betwixt debulking varies with the fabric weight and weave you are using, only typically you should debulk every 3—5 layers. A squeegee or fiberglass roller works well for this. Continue stacking the repair plies until all the fabric that was removed has been replaced. A last surfacing layer tin then be added to cover the entire area. Programme on compacting the concluding repair patch as densely as possible while the resin is curing. The vacuum bagging technique is the most uniform method, but squeegees, rollers, or other clamping pressure volition work adequately. Follow the manufacturer's recommendations for curing the resin. If a two—sided repair has been planned, preparation for the contrary side can brainstorm once the first patch has been fully cured, by and large 48 hours.
Helpful Products
| Particular | Description | |
|---|---|---|
| Reinforcements | Your repair patch should match the original textile used for the function. Using mismatched material tin can cause complications | |
| Resins | Make sure the resin you choose, suits the needs of your projection. Consider the strength, toll, and employ-of-employ of each resin | |
| Measuring Supplies | Remember, your patch needs a 50:50 fiber to resin ratio. Measuring supplies and tools can aid in this | |
| MEKP | Almost resins will need to be combined with a catalyst or hardener like MEKP. Bank check specific production documents for mixing ratios | |
| Squeegees and Rollers | Squeegees and Rollers allow for an even spreading of resin into your fabric, and easily removes backlog from the part | |
Inspect the repair
How to audit a blended repair
Earlier you put your repaired part dorsum into service, you demand to inspect your repair. Employ the coin tap method to inspect the repair afterwards it has fully cured. The entire structure should resonate with the same solid audio. For more than peace—of—heed or more critical parts, non—destructive load testing tin too be implemented at this stage. This consists of stressing the function up to its expected service limit, but non beyond. If the part fails prematurely, even if the failure occurs away from your repair, information technology should be discarded. For more critical structures, a testing laboratory or specialized equipment may be necessary before sign—off.
If your part passes its inspection, you're ready to proceed with the cosmetic repair.
Steps for Cosmetic Repairs
A part'southward outer cosmetic stop is designed to hide and protect the structural reinforcement below, while also being aesthetically pleasing. It is this surface that most people will look at and approximate the whole structure. Even slight impairment like scratches and gouges volition mar the finished appearance. Worse, these frequently create a direct path into the structural layers, causing even larger problems. Corrective blisters are a problem which, left untreated, can turn unabridged gunkhole hulls into sponges.
The cosmetic composite repair sequence is similar to the structural sequence, simply fairing and filling compounds and/or gel coat replaces the reinforcing material. Surface training is still the nigh important attribute of a long—lasting repair. Finish sanding and polishing nowadays an boosted step, but time invested on that step can result in a truly professional composite repair. Many people fear tackling corrective work because they assume it requires expensive spray equipment for satisfactory results. While equipment is important, proper material selection is the key to positive results.
In this section we will provide guidelines for corrective composite repairs, including fiberglass fissure repair, fiberglass gel glaze repair, and composite repair finishing. This will be broken down into 5 steps, which are similar to those required for structural repairs:
- Inspect, Measure and Place.
- Removing damaged material and preparing the surface
- Mix and apply filler
- Shine the repair surface area
At present allow's dive into each of these in more detail.
Audit, Measure and Place
How to inspect cosmetic harm
Inspection of cosmetic damage is just as important as information technology is with structural damage. There are iv master categories for cosmetic composite damage, and you may find 1 or all of these types of harm depending on what your function has been through. The categories are equally follows:
•Gouge A gouge is a long, deep depression in the surface, astringent enough to require filler and a surface coat for repair. Gouges are typically caused by crude handling, glancing impacts, or improper padding.
•Blisters Blisters are bulges actualization on the surface of a function. It is typically acquired past liquid or gas that has gotten into the substrate, forcing the skin away from the glass.
•Scratches Scratches are similar to a gouge, but non deep enough to require filler. Scratches are typically able to exist repair without the need for filler.
•Crazing Craze cracks are hairline fractures that do not get through the thickness of the office, sometimes they practice not fifty-fifty go through the thickness of the surface glaze. Crazing is typically caused past either over-stressing of the part, thermal issues, or stress between or across the layers.
How to measure the scope of your composite repair
Once you understand what type of damage you have, nosotros recommend that you utilize a contrasting marker to outline the boundary of the harm. Notation that gouges oft go out undercut areas of unsupported gel coat which at first will appear to be fine. Notwithstanding, if you printing on them with a edgeless tool, they will easily crack away. It is critical that all damaged areas are fully identified and so they tin can be prepared correctly in the next process. One time you lot have your areas identified and marked, decide the gauge surface area that requires repair.
How to identify composite repair materials
After you've successfully identified the size and scale of the cosmetic damage, you should exist able to approximate how much repair textile is required. Gouges and Blisters will require both filler and gel glaze, while scratches and crazing can typically be repaired with gel coat alone. If your part was originally made with polyester resin, polyester filling compounds and gel glaze are suitable for the repair. If you lot are unsure, we as well offer epoxy fillers as well as Duratec® Surfacing Primer which will offer a surface that either epoxy or polyester can bond to.
Helpful Products
| Particular | Description | |
|---|---|---|
| Fairing and Filling Compound | These are used to fill in deeper scratches and damage. Brand sure to match your compound to the resin you used for the repair | |
| Gel Coats | Gel coats come in a multifariousness of colors to aid lucifer the original color of the function yous are repairing. | |
| Duratec Surfacing Primer | Duratec Surfacing Primer allows y'all to create a surface on your function that Epoxy or Polyester can better adhere to | |
Removing the damaged fabric and preparing the surface
Removing the damaged textile
For both gouges and blisters, you will demand to exist sure that unsupported surface textile is removed. As mentioned previously, this tin be achieved by pressing on them with a blunt tool. One time unsupported textile has been removed, wipe the surface with acetone and a rag to remove any wax, oil or grease which might contaminate the repair.
When the surface has stale, record off the area surrounding the harm. This volition go on sanding scratches to non—damaged areas to a minimum. Keep by chipping out all loose material with a utility pocketknife and so use 40—grit sandpaper to bevel the edges to a taper. Even sparse cracks will accept to be "opened up" earlier material can be added to fill them. Blisters will have to be completely exposed at this time. While y'all are expanding the damaged area, be ensure that the remaining laminate is solid and dry out. If the laminate is not solid and dry, you may have additional structural repairs to complete prior to finishing your cosmetic repair.
Fix the surface
After you've removed the damaged material and opened upward the cracks, utilise a medium dust sandpaper to sand slightly into the surrounding expanse. This will give you lot the ability to plume your repair into the undamaged surface. After you lot've finished sanding the surface, wipe down the surface with acetone one final time to remove dust and anything else that may disrupt adhesion.
Helpful Products
| Item | Description | |
|---|---|---|
| Fillers | When fixing deeper gouges in your role, milled fibers are mixed with resin to create structural putty for the repairs. | |
| Acetone | Acetone is a pop solvent that is used to remove contaminates from the repair surface area, preventing potential complications | |
| PVA | PVA, or Polyvinyl booze, can be sprayed onto the surface of the repair area in order to give you a tack-gratuitous, sandable cure | |
| Sandpaper | Sanding the repair surface area allows you to bevel the edges of the repair area to a taper, making the repair process easier | |
Mix and apply filler
Filling shallow gel coat scratches and crazing
Shallow scratches can be direct filled with color matched gel coat rather than a filling compound. Be sure that you match your gel glaze to a sanded and polished portion of the original, rather than the overall faded color. Your repair may stand up out at starting time, merely everything will fade to the same color in most a month. When using gel coat to fill a scratch, use a small castor to dab in the gel coat. Be certain it is higher than the surrounding surface so that it can be sanded flush. Spray a calorie-free glaze of PVA over the repair for a tack—gratuitous, sandable cure.
Filling compound for deeper scratches, gouges and blisters
Deeper gouges will require structural repair putty to replace the missing cloth before the finish coat of gel glaze is applied. Resin mixed with i/32 inch milled drinking glass fibers is an splendid structural putty. Nosotros also offer a diversity of both polyester and epoxy—based fairing and filling compounds. Use a squeegee to spread your selected filler into the lesser of the gouge. Keep this filler slightly below the surrounding surface if gel coat is the intended topcoat. If painting, the filler can exist level with the surface since pigment adds little thickness. When filling blisters, such as in a fiberglass boat hull repair, be sure to use vinyl ester resin with your milled glass fibers to brand your putty. This volition add together boosted corrosion protection to these weakened areas.
If your cosmetic repair is following a structural repair, information technology may be necessary to level the structural patch with the solid laminate. Both grinding and filling may be necessary to accomplish this. Grind all high spots until they are flush with the rest of the surface, unless this will compromise the structural strength of the patch. Use filler to level any low spots. If grinding cannot accept identify for structural reasons, fillers tin be mildly added to smoothen irregularities and sanded to a smoothen plume, but the patch will and then always exist visible. For marine repairs, use the 1/32 inch milled glass putty filler as described previously. Other structures can usually be filled with standard fillers or past mixing talc and a resin, unless otherwise specified. Go along calculation filler and sanding until the surface is perfectly flush.
Epoxy repairs are quite stable one time they are cured, but polyester repairs should be heated slightly before concluding finishing. Polyester resin in the repair patch and in standard body filler oft continues to shrink for some time when exposed to heat. This tin can be avoided if you utilise 1 of our not—shrink polyester fillers, but otherwise simply identify the project out in the sun for a few days or set upward a oestrus lamp. If a lamp is used, all the same, don't identify the part also close or leave information technology for too long. Y'all are trying to "strength" the filler to shrink prior to final sanding and don't want to distort your part. One time you've sanded to the perfect contour, your part is then stabilized confronting future heat problems.
Mix and utilize the color—matched top coat
For a gel coat finish
If gel coat is the intended top coat, we would always recommend a sprayed application. Nosotros sell a variety of spray guns for the various sizes you might come across on a repair, from a full—sized Gel Coat Cup Gun, down to our Preval Sprayer which can exist used for the smallest repair. All of the gel coats we sell are formulated for awarding via spray gun, and this awarding method provides for the best surface finish. Specifically for repairs, we recommend you mix your gel coat with Duratec® Hi—Gloss Additive. This additive will allow for an open—air cure, thin your gel coat, and reduce orange peel. This means you lot don't need to add wax that would require additional labor, your gel glaze will be easier to spray, and y'all will accept less sanding and polishing to finish your repair. For beneath—the—waterline repairs on marine projects information technology is recommended that you lot use a surfacing agent like PVA or Styrene Wax to ensure a thorough cure. Wax is excellent for large, hard—to—reach areas, but it tin cloud clear gel coats. PVA is best used for spot repairs, or where access is easy while the gel coat is notwithstanding wet.
Gel coat will need to be sanded prior to final buffing. Use a hard rubber sanding cake and start with 400—grit wet/dry paper to level the gel coat. Focus the sanding attempt only on the high spots until everything is flush. Then switch to a foam sanding pad and effectively sandpaper for the perfect finish. Be certain to alter the water each time you movement to a finer-grit sandpaper so the grit particles from the coarser paper exercise not proceed to cut the surface.
For a paint finish
If paint is your top glaze, a surfacing primer is worth applying underneath. The primer will hide the fine irregularities that may still exist while also sealing the patch. For most repairs, Duratec® Surfacing Primer is the all-time fabric for the job. It has a high heat distortion temperature, which further protects already stabilized patches from shrinkage. Most paint systems volition stick to cured epoxy, so be sure to bank check your paint for primer recommendations prior to use.
Helpful Products
| Particular | Description | |
|---|---|---|
| Spray Guns | Spray guns allow for the near even application for gel coats during the application process | |
| Duratec High Color Additive | With the right additive, your gel coat will spread more evenly, and require less sanding and smooth to terminate | |
| Surfacing Primer | When working with a paint top coat, information technology is recommended that you employ a surfacing primer underneath | |
| MEKP | Most resins will need to be combined with a goad or hardener like MEKP. Check specific product documents for mixing ratios | |
| PVA | PVA can be great for marine spot repairs, or areas where it may be hard to reach with other agents | |
Polish the repair expanse
How to terminate a blended repair
The last step of a professional blended repair is buffing and polishing. Our #1102 and #1103 Mold Polishes are prefect for use with either polyester and epoxy patches or gel coat finishes. For polishing a paint finish, y'all volition need only #1103, our Step 2 chemical compound. These compounds will quickly remove the fine scratches left by 600—1000 grit paper while besides removing overspray and some of the halo issue normally left around spot repairs. The Footstep two polish volition give your repair the loftier luster you want for your final shine.
What near SMC? How do I repair SMC?
Canvass molded chemical compound (SMC) is a composite material that is oftentimes used in the automotive, industrial, and personal watercraft market place. SMC poses unique repair problems, and so nosotros will discuss it briefly.
Start, it's of import to recognize SMC equally different from other types of FRP composites so that the proper repair can be performed. Parts made with SMC are typically produced in compression molds, causing them to be smooth on both the inside and outside—typically the offset clue to identifying them. Adjacent, SMC parts practise not have an outer gel coat, rather they are typically colour molded and sometimes painted. Finally, when the paint is sanded from SMC, short fibroid fibers are exposed and the grit that is generated is dryer and more powdery than other composites. These hints will make it easier to place SMC.
Next, you need to select the correct resin. While SMC is a polyester—based textile, it cannot be repaired with polyester resin. This is due to there being a mold release agent present throughout the entire SMC part. Unlike conventionally molded parts, where release agents are applied to the mold surface, SMC is compounded with a release amanuensis dispersed within the resin mix for faster processing. This means that as the damage is sanded to prepare a adept bonding surface, fresh release agent is exposed. Polyester resin products exercise not offering a strong enough physical bond to adhere to this surface. Because of this, SMC should only be repaired using epoxy—based resins, fillers, and adhesives.
How do I finish an SMC repair? Well-nigh SMC repairs will be painted, and only catalyzed type paint systems should be used.
Summary
Composites are a growing category, gaining larger acceptance in all types of modern vehicles, structures, and recreational equipment. The more they are used, the more they volition begin to fatigue and break; when the parts break, they do not all need to be replaced. Past following these procedures, you can exist confident enough to commence on simple repair projects. With a piffling do, y'all tin can expand into more hard tasks. This article is intended to assist get anyone started. Whether you lot are working up the courage to embark on a fiberglass tub repair, a pool repair, or machine body repair, nosotros this article can give you the fiberglass repair tips needed to become started. Practice volition hone and improve your skill, but following these simple guidelines volition permit you to attain a positive event the first time.
In closing, be sure to call back these few keys to a successful repair.
- Start Smart: inspect the damage thoroughly, mark the damage conspicuously, identify what material the original part was fabricated from, and decide if the repair makes sense.
- Training is cardinal: The number i area that dictates the success of a fiberglass repair is the removal of damaged materials and proper preparation of the bonding surface.
- Program the repair: Make your structural repairs ply-past-ply have your materials pre-cut and apply the appropriate resin. For cosmetic repairs, accept the appropriate materials on manus and don't brand more than work for yourself than necessary.
- Inspect and finish: Subsequently y'all've fabricated a structural repair, be certain that y'all audit the part prior to putting it back into service. Subsequently you've made a corrective stop, spend the extra time to make sure it shines.


Source: https://www.fibreglast.com/product/fiberglass-repair-composite-repair/Learning_Center
Posted by: zemanhicat1936.blogspot.com
0 Response to "How To Repair A Chip In A Fiberglass Edge"
Post a Comment